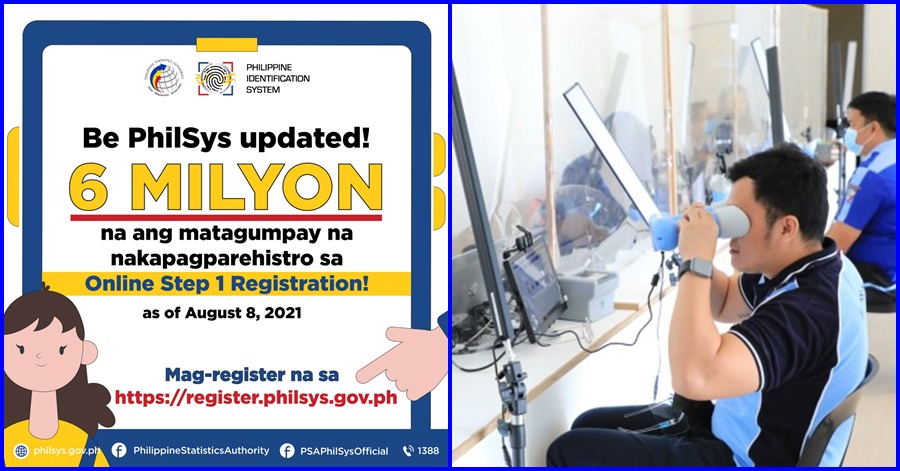
One of the many reasons why Filipinos wanted to have an easy way of identifying themselves was due to the lack of proper documents. This prompted the government to develop the Philippine Identification System, which would eventually lead to the creation of the National ID. A few months back, the national government was able to successfully roll out the initial stage of the Philsys ID registration. Having recorded over six million registered individuals as of August 8, many now look forward to the next step.
Step 2 is when PhilSys verifies and confirms your personal information, as well as when your biometric information, such as fingerprints, iris scans, and ID photographs, is obtained from you as part of your one-of-a-kind and lifetime registration to the National ID system. Online registration for the national ID is already open, and numerous candidates have already been sent to Step 2, which involves the submission of papers and biometrics. You’ve filled out the online form and submitted it. So, what’s next?
If you are set to take Step 2 soon, make sure to read the rest of this guide.
Philsys ID Registration – Step 2: Here’s What You Need to Know
For those who are wondering, the PhilSys Step 2 Registration entails the verification of supporting documents as well as the capture of biometric data at registration centers.
Since the Philippine Statistics Authority’s launch of the Philsys online registration site (https://register.philsys.gov.ph.) nationwide on April 30, 2021, through the website, all Filipinos can now take the first step toward obtaining a national ID by entering their information and scheduling an appointment with the nearest registration center.
Just to give perspective, the objective of PhilSys is to make the operations of government agencies more efficient and effective. This system is carried out by issuing a PhilID and a Philsys Number (PSN) to enable citizens and residents to register and gain access to public services.
Keep in mind that these are two completely different things! The former is a physical card that can be used as an identification proof, while the latter is a 12-digit permanent identification number.
During the third quarter of 2020, more than 8.4 million Filipinos have already completed Step 1 Registration. This achievement allowed the government through the Philippine Statistics Authority (PSA) to increase its initial pledge to 11 million by end of 2021.
With this in mind, here are the things you need to remember and prepare for the second step in registering for the Philsys ID:
List of Things to Bring:
There are several things that you need to prepare before you go ahead with your registration for the Philsys – Step 2:
- Documents that support or establish your basic identifying information, such as your name, date of birth, and residence. The finest document you can provide them to confirm your identification is your PSA birth certificate (especially if you do not have a valid government-issued ID).
- Appointment slip or Appointment Reference Number issued at the time of house-to-house registration).
- Bring your primary or secondary supporting documents. Here’s a list of what you can bring:
Primary Documents:
Note: Any of the primary documents listed below should be brought by the registrant. You must bring the original document with you!
- ePassport or DFA-issued Philippine Passport
- SSS or GSIS-issued Unified Multi-purpose Identification Card (UMID)
- Land Transportation Office (LTO)-issued Student’s License Permit or Non-Professional/Professional Driver’s License
- PSA-issued Certificate of Live Birth AND one (1) government-issued identification document bearing the registrant’s full name, front-facing photograph, and signature or thumb mark
(If the PSA-issued Certificate of Live Birth and the government-issued ID provided do not match, the PSA-issued Certificate of Live Birth will be used as a supplemental supporting document.)
Secondary Documents:
If you don’t have any of the primary documents, you can still bring several of the following:
- Integrated Bar of the Philippines (IBP) Identification Card
- LCRO-issued Certificate of Live Birth
- License to Own or Possess Firearms (LTOPF) ID
- National ID from other countries
- NBI Clearance
- Overseas Workers Welfare Administration (OWWA) ID
- Pantawid Pamilyang Pilipino Program (4Ps) ID
- Philhealth ID
- Philippine Retirement Authority (PRA)-issued Special Resident Retiree’s Visa (SRRV)
- Police Clearance/ID
- Postal ID
- Professional Regulatory Commission (PRC) ID
- PSA-issued Certificate of Foundling
- PSA-issued Certificate of Live Birth/NSO-issued Certificate of Live Birth with Birth Reference Number (BreN)
- PSA-issued Report of Birth
- PWD ID
- Residence ID from other countries
- Seaman’s Book
- Senior Citizen’s ID
- Solo Parent’s ID
- SSS ID
- Taxpayer Identification Number (TIN) ID
- Voter’s ID
Meanwhile, the following set of documents can also be accepted as long as they have the following: a front-facing photograph, a signature/thumbmark, and full name or permanent address.
- Employee ID
- School ID
- Barangay Clearance/Certificate d. Barangay ID
- City/Municipal ID
- A copy of your Step 2 successful booking confirmation with QR Code (print-out or screenshot on your phone can be accepted)
How to Book a Slot for the Step 2 PhilID and Philsys Registration
- After completing Step 1, go to https://register.philsys.gov.ph where you will register for your Step 2 appointment. Log in to complete your registration.
- Enter your mobile phone number or e-mail address, which is presumed to be permanent. When deciding which to use, consider how long you’ll be with them. Because it is the Republic of the Philippines’ national ID, your PhilID is a “lifetime” sort of identification. It will be the most formal identification you will ever possess. Please use your email address if you are the sort who frequently changes phone numbers.
- To authenticate your identity, enter the One-Time Pin (OTP).
- You will be able to see your Applications after successful verification. Select Modify Application from the drop-down menu.
- Check all of your information, including your blood type. Confirm the details so you can move on to the next step.
- The next step is to reserve your time slot — select the closest or most accessible location, and then choose either Morning or Afternoon schedule.
- You will need to capture a copy of the confirmation page, or print one, which will be brought with you to your next appointment. If not, bring your phone with you.
Do’s and Don’ts:
- Do not wear sando and sleeveless blouses and shirts.
- Because your ID photo will be taken and they need to capture the most accurate image of you, do not wear too much make-up.
- Before they collect your biometrics, take off your glasses, contact lenses, earrings, necklaces, and any facial piercings, as you would for getting your passport photo taken.
- When entering the registration center, always wear your face mask and face shield.
- Always observe social distancing. In the event that you are suffering COVID-19 symptoms on the day of your visit, you may be rescheduled.
Capture of Biometric Data
Your biometrics will be taken once your documents have been verified. To get started, make sure that you’re not wearing sleeveless tops and clothes that show too much skin. Avoid wearing heavy makeup and take off all of your accessories.
For this purpose, the wearing earrings or necklaces will also be prohibited. Colored contact lenses are also not allowed – only clear ones will be permitted. Obviously, because the registration facility is a public space which is expected to accommodate a large number of people at a time, remember to observe the safety protocols. Let us go through some of these in brief:
- Make sure to keep your hands clean frequently.
- Cough or sneeze into the bend of your elbow, not your hands!
- Keep your hands away from your eyes, nose, and mouth.
- Reduce the number of social functions you attend and the amount of time you stay in crowded settings.
- Avoid being in close proximity to someone who is sick.
- Frequently touched objects and surfaces should be cleaned and disinfected.
You’ll be directed to the Biometric Station once your documents have been verified. They’ll perform a variety of tests on you, including an iris scan and a fingerprint scan. For the ladies, it’s important to keep your hair fully tucked behind your ears. This ensures that it’s not exposed to the light. Also, just like getting your photo taken for your passport, you’re not allowed to smile – a straight face is all you need to make to complete the photo-taking session at the registration center.
After you’ve received your biometrics, the staff will check the areas to make sure that all of your data is accurate. Once you’re done, you’ll be given a transaction slip. This is where you will get your PhilID and PhilSys Number, which will be delivered to the address that you specify.
Important: For your safety, do NOT post photos of your transaction slip online. Even after you receive your PhilID, it’s important not to post the data provided in your ID card on any online platform. You do not want malicious eyes to get a hold of your data and use it to exploit your personal security.
Note: The transaction slip for this step contains a lot of information about you. Do not share this information with anyone as they could use this against you.
What’s Next? – Step 3
The waiting game begins once you’ve finished Steps One and Two. There’s no official word on how long it will take for your PhilID to be processed following Step Two, but be prepared to produce your transaction slip to the PHLPost whenever it arrives. One million PhilIDs have already been released, with 343,742 PhilIDs delivered across the country as of July 2, 2021.
Video: How to Register for the Step 2 Philsys Registration
In this video, the vlogger gives some helpful tips and an overview on how to register for the Step 2 Philsys ID Registration. He also shares some useful tips and tricks on how you can ensure a more convenient application. If you haven’t got the slightest idea of what to expect in this process, you can watch this video in addition to the information presented in this guide.
For a more detailed explanation provided by the PhilSys-Comms Team, here’s a video explaining the registration process of the PhilSys ID in several parts.
Frequently Asked Questions
1. What are some of the benefits you can get from having a Philsys ID?
- a) Did you know that having a Philsys ID offers benefits in addition to accessibility to government services? One of these is enabling unbanked Filipinos to open a LandBank account without any initial deposit. You can also register an account for FREE. Through this partnership, the Philippine Statistics Authority and Land Bank of the Philippines are offering free bank accounts to PhilSys users.
You need to at least complete Step 2 of the Philsys registration so that you can avail of this free perk with the Landbank of the Philippines.
Following Step 2, you will be able to access financial inclusion through various LandBank booths and self-serve kiosks located throughout the office.
It’s important to note that opening a Landbank account is optional, thus it’s not a requirement for PhilSys candidates.
Having a bank account will make it easier for Filipinos to make digital payments for a variety of purposes, such as paying bills and sending and receiving money. After all, we are living in the digital age, therefore having a bank account is essential.
- b) Another benefit you can get with the PhilID is when you use it to claim social welfare from the DSWD. The PSA and the DSWD signed a memorandum of understanding on the use of the PhilID as a legitimate identification and verification card on September 17, 2021. Members of the DSWD can now apply for vital assistance programs and social welfare projects using their Philsys number.
Because of the PhilID’s still-new design, the Philippines’ government has already recognized its use as a method of authentication.
2. What Are The Benefits Of PhilID In Verifying and Claiming DSWD Programs?
According to a report by the Philippine News Agency, the benefits of adopting thePhilsys in verifying and claiming DSWD programs, include:
- a system set up for United Beneficiary Database,
- financial inclusion and digital payment,
- identification and removal of duplicate/ghost beneficiaries, and
- streamlined registration for beneficiaries of the DSWD,
Through this agreement, the DSWD noted that Filipinos can now enroll in various programs through their PhilID card. Also, the agency will be able to identify their records using the PhilSys number.
In times of disaster, the DSWD now has a better grasp of how to administer relief assistance to Filipinos. This will also assist them in preparing for crises that are unavoidable.
3. Why does the Phil ID Card not have a signature?
According to the Philippine Statistics Authority, the PhilID was designed to provide more security and modern identity verification features to prevent forgery, fraud, and identity theft. It is also more secure than paper documents.
In fact, there is a higher chance of fraudulent activities being carried out due to the traditional methods of doing business such as using paper forms and photocopy of ID.
Aside from this, many Filipinos simply cannot provide a handwritten signature. This is why the thumbmark was replaced with a handwritten signature.
PhilSys has implemented various security enhancements for the PhilID that allow users to authenticate themselves using various methods. These include the ability to authenticate using a physical security feature, digital verification, and SMS one-time passwords.
The Philippine Statistics Authority identified three factors that led to the National PhilID’s lack of signatures:
- Ensure the PhilID remains universally accessible and usable for all Filipinos.
- Incentivize the use of digital technologies and more modern approaches for identity verification; and
- Promote greater security in transactions through stronger methods of verification and lower risks of forgery;
4. Will the Philsys ID eliminate the need for other forms of government identification?
Although the PhilID is not replacing the existing government IDs, it will serve as a foundational ID that can be used for various purposes. In the future, once it has been successfully rolled out, both the private and public sectors will acknowledge its importance
5. What is the price and expiration of the PhilID?
Recently, a scam involving the registration and application for the PhilID has surfaced.
It doesn’t come with a price tag — it’s free. For the first (1st) issuance to Filipinos, the PhilID is and will always be free.
However, if the card is damaged or lost, you will have to pay for a replacement.
Furthermore, the PhilID’s validity is required. The PhilID only has a one-year expiration period for resident aliens. Filipinos, on the other hand, won’t have to worry about an expiration date because it doesn’t have one!
- How Does The PSA Assure People of Their Private Data?
One of the most critical concerns of our country is the protection of our personal data. This is considered gold in our age, and it can be easily erased.
R.A. 11055 outlines how the PSA will handle, manage, and protect your data and information:
However, they can and will only share data or information if ONE of the following conditions is met:
- Before the procedure, the registered individual has provided his or her consent; if he or she has given particular agreement to it.
- The information is immediately communicated to the owner if the registered person has a compelling interest in public health or safety, and there is a risk of substantial harm.
Summary:
With the registration process now in full swing, applicants must be well informed of what they need to do and the process for this next step. If you have friends, colleagues, and family members set to take the second step for their Philsys ID registration, be sure to share this guide with them.
You now have a guide to help you and your family members register for the Philsys ID. We hope that this article has been helpful in providing information about what you need to do next, as well as how we can support you throughout the process. If there is anything else you wish to know that is not addressed in this guide, you can head over to the Philsys website or send them an email to info@philsys.gov.ph. The team at Philsys will be happy to answer any questions or concerns that arise before, during, or after registration.
Done with your registration? Let us know how your experience went. Are there any tips you’d like to share with others on how they can have an easier or more convenient registration in relation to your location? Let us know by leaving a comment in the section below!
Contact Information:
Philippine Statistics Authority (PSA)
Website: http://psa.gov.ph/philsys/
Telephone Number: 1388
Email: info@philsys.gov.ph
Facebook Page: https://www.facebook.com/PSAPhilSysOfficial/
Google Map Location:
READ NEXT: Get to Know the Features of the PhilSys ID