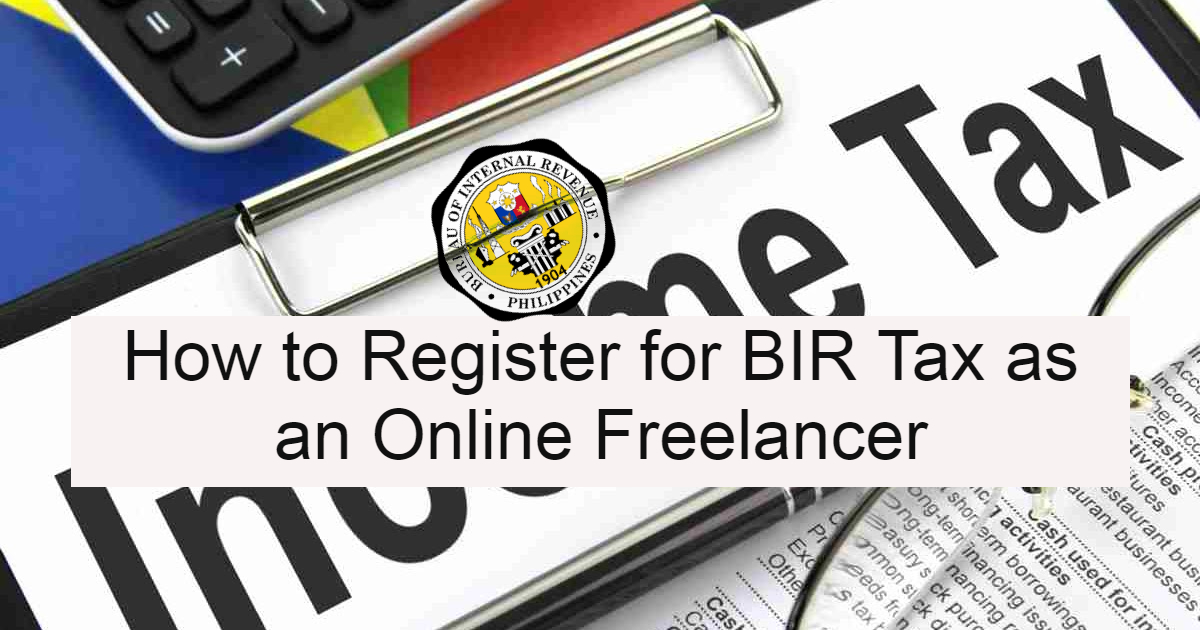
Filipino freelancers who work online or offline, it is important that you are aware of how the BIR tax works. If you are receiving any type of compensation for a product or service, it is important that you get your business or side jobs registered. Here we share details on how to register for BIR Tax as a freelancer in the Philippines.
Whether you’re single, dating, married, with or without kids—the need to work and earn money is a given. In this time and age when computers dominate most everything, and even work options, being a freelancer is just another one of the emerging options to earn money.
Also Read: What Taxes do OFWs Need to Pay in the Philippines?
As the gig economy grows, some may falsely assume that being a freelancer means they aren’t governed by existing government mandates like paying SSS, Philhealth, and Pag-IBIG contributions and BIR taxes. In reality, freelancers take care of these government contributions by themselves, as opposed to just waiting for salary deductions for employed individuals.
The fact is, in the eyes of the powers that be in the Philippine government, all kinds of income are subject to government taxes. That said, even earning from freelance work is taxable as well. Though there are few who really know how freelancers handle their dues, the dues to the various government agencies exist for every freelancer, much like every employed individual.
What qualifies as a freelancer in the Philippines?
A solopreneur or freelancer is a skilled individual who offers their services or specialized crafts for a fee. They are categorized as self-employed. They could work either part-time or full-time, though the terms of their jobs are usually bound by a contract with a specified duration. There isn’t any expectation for permanence and longevity does not equate to the security of tenure, which is how it differs from regular employment.
Unlike regular employed individuals, freelancers also don’t get a fixed salary. At best, they get paid by the contract, either per hour, per output, or per project.
In the Philippines, the government defines freelancers as:
Persons whose income comes from whatever business they engage in,
Professionals including (1) those who get paid for their professional services (e.g. lawyers, PRC-licensed personnel like doctors, dentists, midwives, etc.) and (2) those who pursue art and sports and make a living from it (e.g. artists, writers, athletes, etc.),
Online freelancing jobs and online businesses (e.g. virtual assistants, graphic artists, content writers, bloggers, vloggers, and podcasters)
Why should freelancers register for BIR tax?
Though the National Internal Revenue Code (NIRC) did not explicitly name freelancers among its categories this does not mean that they are exempted from paying taxes. There’s a “professional” category that basically covers professional freelancers as well as those individuals who qualify as a freelancer or solopreneur as defined by the Philippine government.
Legal consequences of Tax Evasion for Freelancers
With the passage of the Tax Reform for Acceleration and Inclusion (TRAIN) law in 2018, there were some changes to tax payment, but this does not mean that freelancers no longer need to pay their taxes. Instead, the TRAIN law exempts those whose annual income is P250,000 or less. On the flip side, those whose income goes beyond this threshold are obligated to pay their income tax based on the graduated tax table along with a three percent percentage tax. The government also requires 12 percent VAT payment if the annual revenues are greater than P3,000,000. For those who qualify as a non-VAT taxpayer, there’s the option to pay eight percent on gross receipts. Note that this flat tax can be a bit disadvantageous, particularly if there are a lot of deductible expenses.
Though the law is clear, the truth is, the Bureau of Internal Revenue (BIR) does not have sufficient teeth to chase after all tax evaders. They don’t have enough budget, personnel, and hardware so they can’t exactly go after everyone. Instead, they tend to go after bigger fish, including high-profile personalities like doctors, lawyers, and celebrities. That said, if you are operating as a freelancer, as long as you’re not caught, evading taxes will have little impact on you.
If you get caught, however, the legal consequences are dire. Failure to pay your tax may lead to the government hounding you for tax evasion. Non-filing of appropriate forms comes with certain penalties like imprisonment for two to four years and payment of fines, interest, compromise fee, and penalties which cost so much more than the original tax. On top of that, it could affect your credit standing with banks as well as your chances for future employment.
Freelancer Benefits to registering for BIR tax
Legal ramifications aside, there are also some benefits to registering for BIR tax as an online freelancer. Some of these benefits include:
- Improved credibility
A BIR registration can do wonders for the freelancer’s credibility. It offers a sense of stability for the freelancer’s reputation, and a sense of security for their clients. After your BIR registration, you’ll get a Certificate of Registration (COR, also known as BIR Form 2303), just like a regular legitimate business.
- Increased work opportunities
Some clients, especially freelancers who offer their services to companies, require official receipts (OR). By registering with BIR, freelancers no longer have to turn down offers that require ORs, thereby increasing their market share.
- Updated tax records
Though it may seem unimportant at this point, registering with BIR allows a freelancer to secure their annual Income Tax Return (ITR) form which is particularly important when trying to file for loans with banks or government agencies like SSS or Pag-IBIG as well as when they apply for a visa to travel abroad. If you are not registered, you won’t be able to get an ITR.
- Ability to issue official receipts (OR)
Most B2B clients require official receipts for their business records so if you as a freelancer want to penetrate this market, then you should process your BIR registration as a freelancer as soon as possible. An OR is, after all, a legal document that they can use in their business declarations.
- Contribute to the local economy
Taxes, regardless of how hateful they look when you stare at your bank records, invoice, or payslip (if you are employed) are originally intended for good use. It’s meant to fund beneficial government projects, in the hopes of making life just a little bit better for the people. Unfortunately, some corrupt leaders refuse to solely use the funds as intended—to help the community fund different programs that will be beneficial to everyone.
Though there might be different reasons to go for BIR tax registration, we hope that in the event that you do go for it, you’ll see it more as a necessity than a burden.
How to register for BIR tax as a freelancer?
Before getting on with the first step for BIR tax registration, a freelancer can call the BIR first to know which BIR Revenue District Office (RDO) covers your area. It’s best to check about their processes and requirements as well, as some of the RDO may have slightly different protocols than others.
Note that the steps listed in this guide to registering for BIR tax is written under the assumption that you already have an existing TIN. In case you don’t then please do register for a TIN first. It can be done online or at the nearest RDO.
What documentary requirements must a freelancer prepare?
When transacting with BIR, it’s best to prepare both the original and a photocopy of the forms and the other documentary requirements needed. As for the BIR forms, you may download it online or ask the Officer of the Day to man the RDO Information Booth. It’s still best to fill out the forms electronically before printing them on A4 paper to ensure that everything is legible.
Here are the documents and forms you’ll need to prepare:
- PSA Birth Certificate (original and photocopy)
- At least two (2) government-issued IDs
- At least 5 photocopies of one (1) valid government-issued ID (with three specimen signatures)
- TIN
- Occupational Tax Receipt (OTR)
- Barangay Certificate (original and photocopy)
- One (1) soft copy and one (1) physical copy of Application for Registration Information Update/Correction/Cancellation /BIR Form 1905 (version January 2018 ENCS) – This form is used for declaring business activity change, updating business or personal information, transferring of RDO, or changing of registered address.
- Two (2) copies of Application for Registration for Self-Employed (Single Proprietor/Professional), Mixed-Income Individuals, Non-Resident Alien Engaged in Trade/Business, Estate, and Trust/ BIR Form 1901 (version January 2018 ENCS) – This form is used for the registration of self-employed and mixed-income individuals.
- Three (3) copies of Payment Form/ BIR Form 0605 (version July 1999 ENCS) – this document is used to process payment for annual registration fees and penalties and is required when processing most Philippine tax types, including freelance tax.
- Application for Authority to Print Receipts and Invoices/ BIR Form 1906 – You’ll need to fill out this form in case you decide that you don’t want to avail of the BIR-Printed Receipts (BPR). It’s quite useful, particularly as there aren’t all that many transactions within this period, so says BIR Revenue Memorandum Circular 117-2019.
- Book of Accounts – You will need one (1) unused journal book, one (1) ledger book, and two (2) columnar books (for cash disbursement and cash receipt) for this.
- Proof of the nature of your freelancing work – This may vary depending on your state as a freelancer as well as the RDO’s requirements but it’s generally just the following:
With existing clients: Two (2) photocopies and an original copy of your client contracts and two (2) photocopies of Occupational Tax Receipt (If you already got it from your city or municipal hall’s Treasury Office)
New freelancers: Two (2) copies of a notarized affidavit stating your personal information and profession
Marriage contract, if applicable
This last form is not required, but if you like to track your progress you might as well print out a copy of the BIR Checklist of Documentary Requirements F1101 so you’ll have a guide. Having a copy on hand will ensure that you have everything you need before you even head to your RDO.
What are the steps to take when freelancers register for BIR tax?
Step 1: Secure an Occupational Tax Receipt (OTR).
More than a receipt, the OTR is actually more of an Occupational Permit. To get it, pay your local City/Municipal Treasurer’s Office a visit along with your Barangay Clearance, a health permit from the City or Municipal Health Office, and your proof of work or a copy of your client contract. Some offices may not need a health permit, so make sure to check beforehand.
Note that the OTR is only for non-licensed professionals. That said, this only applies to writers, web designers, editors, and graphic artists. For licensed professionals like accountants or engineers, they need a Professional Tax Receipt (PTR).
Step 2: Secure your TIN.
Assuming that you have been working for a while and already have your TIN, but you’re now freelancing from home, chances are, your TIN may still be registered in a different RDO. If you want to register as a freelancer from where you live but your TIN registration is elsewhere, you’ll have to transfer to the RDO with jurisdiction over your place of residence.
Request For Transfer Of RDO (Via Email)
To transfer your RDO, here’s what you need to do:
- Determine your old RDO. To do this, you may reach out to your previous employer’s Human Resources Department (HRD) or check you ITR or BIR Form 1701. You can also check the BIR Revenue/District Offices page for the correct codes if you know their BIR branch.
- Download and fill out the BIR Form 1905 (Application for Registration Information Update/Correction/Cancellation) and follow the following instructions:
- Fill out the following fields:
- 1 TIN
- 2 RDO Code
- 3 Contact Number
- 4 Registered Name (Last Name, First Name, Middle Name)
- 7B Check the applicable option
- Mark “Transfer within same RDO” if your TIN is registered in the same area/city as your previous employment or if you just wish to update your records.
- Mark “Transfer to another RDO” if your TIN is registered in another area/city different from the place where you want to register as a freelancer.
- 12 Sign
- Fill out the following fields:
- Once done, email a copy of your form to your old RDO.
Note that RDO transfer requests take at least a week to process. You also have the option to confirm the transfer by sending an email to your new RDO.
On the other hand, if you plan to register as a freelancer within the same jurisdiction area of your previous workplace, there is no need to request for RDO transfer so you can skip to Step 3.
Step 3: Apply for a COR.
- In-person, at the nearest RDO.
- Upon arrival at the RDO, present your 1901 to the guard on duty and mention that you are registering as a self-employed individual so they can point you to the right counter where you’ll need to queue.
-
- Get your queue number and wait to be called.
- Prepare yoir documentary requirements:
- 2 copies of Form 1901,
- 3 copies of Form 0605,
- 3 photocopies of your valid ID, and
- proof of nature of work (contract/OTR/affidavit).
- P530.00 for the fees (P500 for the annual registration fee plus P15 for the certification fee and P15 for the documentary stamp tax)
- Once done, pay P530.
- You will have to pay another P32 separately if you inform the cashier that you would like to avail of the BIR Printed Receipts (BPR). The payment receipts for the annual registration fee will be separate from that of the the BPR.
- Make copies of your annual registration fee receipt before you submit it along with the other requirements.
- Once submitted, the processing officer will inform you of the release date of your COR.
-
- Via Email
-
- Prepare the digital copy of the documentary requirements and submit it to your RDO via e-mail in this format.
- Email Subject should read: INBR_<Last Name_First Name_Middle Name>_Application
- The email body must include the following details:
- Name of taxpayer
- Name of authorized representation (if applicable)
- Position of Filer
- Contact Number
- List of attached documents
- If everything is complete, you will receive an acknowledgment receipt along with the filing reference number (FRN) . You will be advised of any penalties or irregularities in the application, if there’s any.
- If there are no issues with the application, you can make your payment (P530) via any online payment facilities.
- Once paid, send an email to your RDO with the payment reference number and proof of payment showing your FRN.
- The RDO will send you via email you the schedule of release for your COR and Authority to Print (if you will availed of this option).
- Prepare the digital copy of the documentary requirements and submit it to your RDO via e-mail in this format.
You will have to go to your RDO on your scheduled date to pick up the COR and submit the original documents.
- Via Courier Or Dropbox
-
- Prepare the documentary requirements and have them all enclosed in a sealed envelope.
- Make sure you include a sheet with the following information:
- Name of taxpayer
- Name of authorized representation (if applicable)
- Position of Filer
- Contact Number
- List of attached documents
- Mail your requirements to the designated dropbox of your RDO or send it via courier.
- Wait for the acknowledgment receipt which will include the filing reference number (FRN) along with any penalties or irregularities in the application, if there’s any.
- If there are no issues with the application, proceed with COR payment (P530) via any online payment facilities.
- Once paid, send the payment reference number and proof of payment with your FRN to your RDO via email.
- The RDO will send you the details of the schedule of release for your COR and Authority to Print (if you will avail of this option) via email.
- Go to your RDO on your scheduled date and submit the original documents.
Step 4: Claim your COR.
Make sure you go to your RDO on the scheduled claiming date to pick up your COR. Don’t forget to bring your payment receipts and/or original documents when you do.
Once there, you should receive a copy of each of the following:
- BIR Form 1901
- BIR Form 0605
- Payment receipt
- the COR
- Your taxpayer’s verification slip.
Step 5: Register your Books of Accounts
Also, do not forget that your journals and ledgers need to be stamped to confirm their registration.
There are different ways of getting this done:
- In-person
-
- After receiving your COR, get a queuing number to have your books stamped and signed.
- Present 1 copy of Form 1905 (Registration of Books of Accounts), 1 photocopy of your valid ID, and your books to the officer.
- Via Email
-
- Prepare a digital copy of Form 1905 (Registration of Books of Accounts) and a digital copy of your valid ID.
- Submit documents to your RDO following this format:
- In the Email subject like, type: iBOA_<Last Name_First Name_Middle Name>_Application
- In the email body, make sure you include rhe following information:
- Name of taxpayer
- Name of authorized representation (if applicable)
- Position of Filer
- Contact Number
- List of attached documents
- Wait for the acknowledgment receipt and filing reference number (FRN). You will be advised of any penalties or irregularities in the application, if there’s any.
- If there are no issues, proceed with payment of fees or penalties via any online payment facilities.
- Once paid, email the payment reference number and proof of payment with your FRN to your RDO.
- The RDO will email you the approval of the application, along with your appointment date, and the PDF copy of the stamp to be filled up and affixed on the first page of the BOA.
- Go to your RDO on the appointed date and submit the original documentary requirements and your Books of Accounts to the BOA Releasing Counter. You may also opt to book a courier service to bring the original documents to your RDO and pick up the duly approved application form and related document.
- Via Courier Or Dropbox
-
- Prepare 1 copy of BIR Form 1905 and 1 photocopy of your valid ID.
- Enclose the documents in a sealed envelope and prepare a sheet with the following information:
- Name of taxpayer
- Name of authorized representation (if applicable)
- Position of Filer
- Contact Number
- List of attached documents
- Submit the requirements. Look for the designated dropbox of your RDO or send your documents via courier.
- Wait for the acknowledgment receipt and filing reference number (FRN). You will be advised of any penalties or irregularities in the application, if there’s any.
- If there are no issues, proceed with payment of fees or penalties via any online payment facilities.
- Once paid, email the payment reference number and proof of payment with your FRN to your RDO.
- The RDO will email you the approval of the application, appointment date, and the PDF copy of the stamp to be filled up and affixed on the first page of the BOA.
- Go to your RDO on the appointed date and submit the original documentary requirements and your Books of Accounts to the BOA Releasing Counter. You may also book a courier service to bring the original documents to your RDO and pick up the duly approved application form and related documents.
Note: It’s best to confirm with your RDO if you only need to prepare two (cash disbursement and cash receipt) or all four books to avoid wastage.
Final Thoughts
Registering with BIR is not that difficult, but it can get stressful and time-consuming if you don’t know better. I once tried to find out more information by going to a BIR satellite office and I ended up with instructions to register a business with DTI. It’s funny, but it sure makes it tough if you go without having enough information prior to your visit.